Operating Modes
All three operating modes are possible with the measuring tool in horizontal and vertical position.
Rotational operation
Rotational operation is especially recommended when using the laser receiver. It is possible to select between different rotational speeds.
Line operation
In this operating mode, the variable laser beam moves within a defined aperture angle. This increases the visibility of the laser beam in comparison to rotational operation. You can select between different aperture angles.
Point operation
In this operating mode, the best visibility of the variable laser beam can be reached. For example, it is used to easily project heights or to check building lines.
Line and point operation are not suitable for use with the laser receiver (41).
Each time after switching on, the measuring tool is in rotational operation mode with standard rotational speed (600 min−1).
To switch from line operation to rotational operation, press the rotational operation button (6) or the rotational operation button (26) on the remote control.

To change the rotational speed, press the rotational operation button (6) or the rotational operation button (26) on the remote control as many times as needed until the required speed is indicated on the display.
The set speed can be seen on the rotational speed indicator (h) on the start screen.
When working with the laser receiver, the highest rotational speed should be set. When not working with the laser receiver, reduce the rotational speed for improved visibility of the laser beam and use the laser googles (50).
To switch to line or point operation, press the line operation button (5) or the line operation button (28) on the remote control.
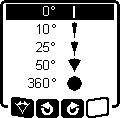
To change the aperture angle, press the line operation button (5) or the line operation button (28) on the remote control until the required operating mode is indicated on the display. The aperture angle is reduced in stages each time a button is pressed until point operation is achieved.
At 360°, the measuring tool is again in rotational operation. The rotational speed is the last set speed.
Note: Due to inertia, it is possible for the laser to slightly move beyond the end point of the laser line.
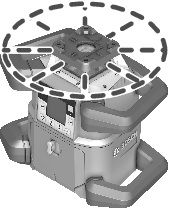
In line and point operation, the laser line or the laser point can be positioned within the rotational plane of the laser. Rotation is possible by 360°.
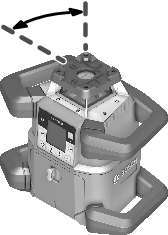
To rotate anticlockwise, press the button  (4) on the measuring tool or the button for anticlockwise rotation (29) on the remote control.
To rotate clockwise, press the button  (3) on the measuring tool or the button for clockwise rotation (36) on the remote control.
When the measuring tool is in the vertical position, it is possible to rotate the laser point, laser line or rotational plane around the X-axis for easy sighting out or parallel alignment in a range of ±8.5 %.
To start the function, press the slope button (14) on the measuring tool or the slope button (31) on the remote control. The menu for setting the slope of the Y‑axis will appear and the symbol for the Y‑axis will flash.
To rotate the rotational plane, press the ▲ button (4) or the ▼ button (3) on the measuring tool or the up (30) or down (35) slope button on the remote control until the required position is reached.
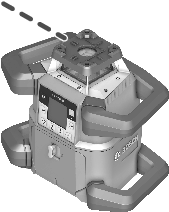
To align the measuring tool against a reference point on the ground when it is in the vertical position, the variable laser beam (8) can be turned downwards to be used as a plumb point. The plumb point function can only be started via remote control or the Bosch Levelling Remote App app.
The variable laser beam plumb point is not self-levelling. Therefore, ensure that the measuring tool is levelled in when starting the plumb point function.

To start the downwards plumb point function, press the plumb point function button (25) on the remote control. The plumb point function symbol will appear on the display while the variable laser beam is aligned vertically. After it has been successfully aligned, the plumb point function indicator (e) will appear on the start screen.